19、ROS2 Launch启动文件配置
1、launch介绍
到目前为止,每当我们运行一个ROS节点,都需要打开一个新的终端运行一个命令。机器人系统中节点很多,每次都这样启动好麻烦呀。有没有一种方式可以一次性启动所有节点呢?答案当然是肯定的,那就是Launch启动文件,它是ROS系统中多节点启动与配置的一种脚本。
ROS2中,launch用于多节点启动和配置程序运行参数等功能,ROS2的launch文件格式有xml、yaml和python格式。本节课程以python格式的launch文件为例,相对于另外两种格式,python格式的更加灵活:
- python拥有众多的函数库,可以在启动文件中使用;
- ROS2通用启动特性和特定启动特性是用Python编写的,因此可以访问XML和YAML可能没有公开的启动特性;
使用python语言编写ROS2 launch文件,最主要的是把每个节点、文件、脚本等抽象成一个action,用统一的接口来启动。
参考资料:
-
launch系统设计文档:ROS 2 launch系统设计文档
-
launch官方API文档:launch API文档(随官方更新)
-
准备工作,创建功能包存放程序文件
ros2 pkg create learn_launch \--build-type ament_python
2、编写单个Node节点的launch
2.1、新建launch文件
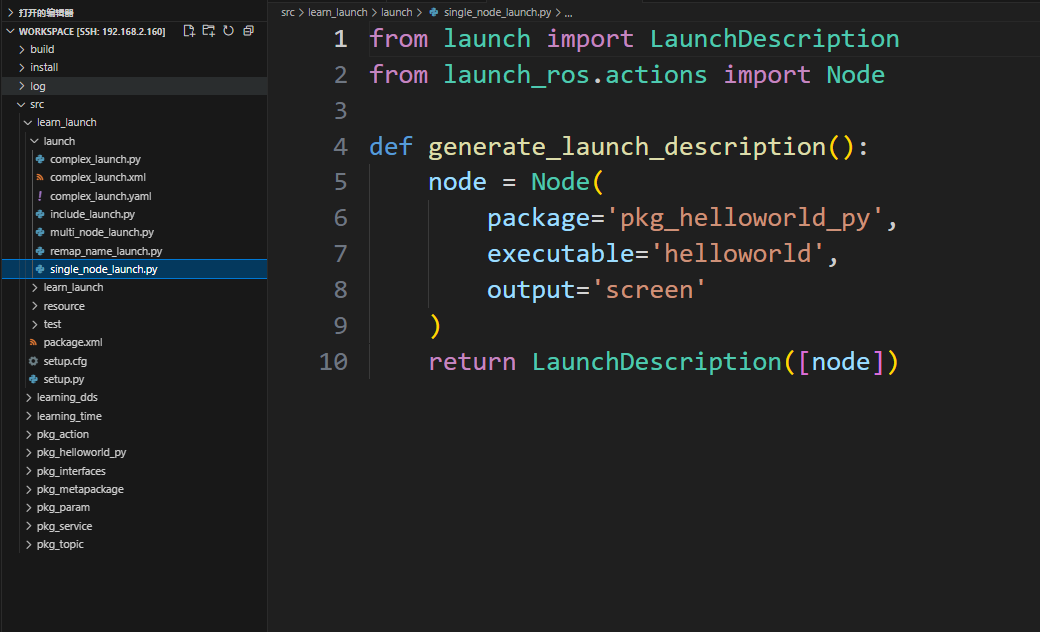
在功能包下新建一个launch文件夹,然后在launch文件夹内新建【single_node_launch.py】文件,把以下内容复制到该文件中:
x from launch import LaunchDescription from launch_ros . actions import Node def generate_launch_description (): node = Node ( package = 'pkg_helloworld_py' , executable = 'helloworld' , output = 'screen' ) return LaunchDescription ([ node ])
2.2、配置setup.py文件
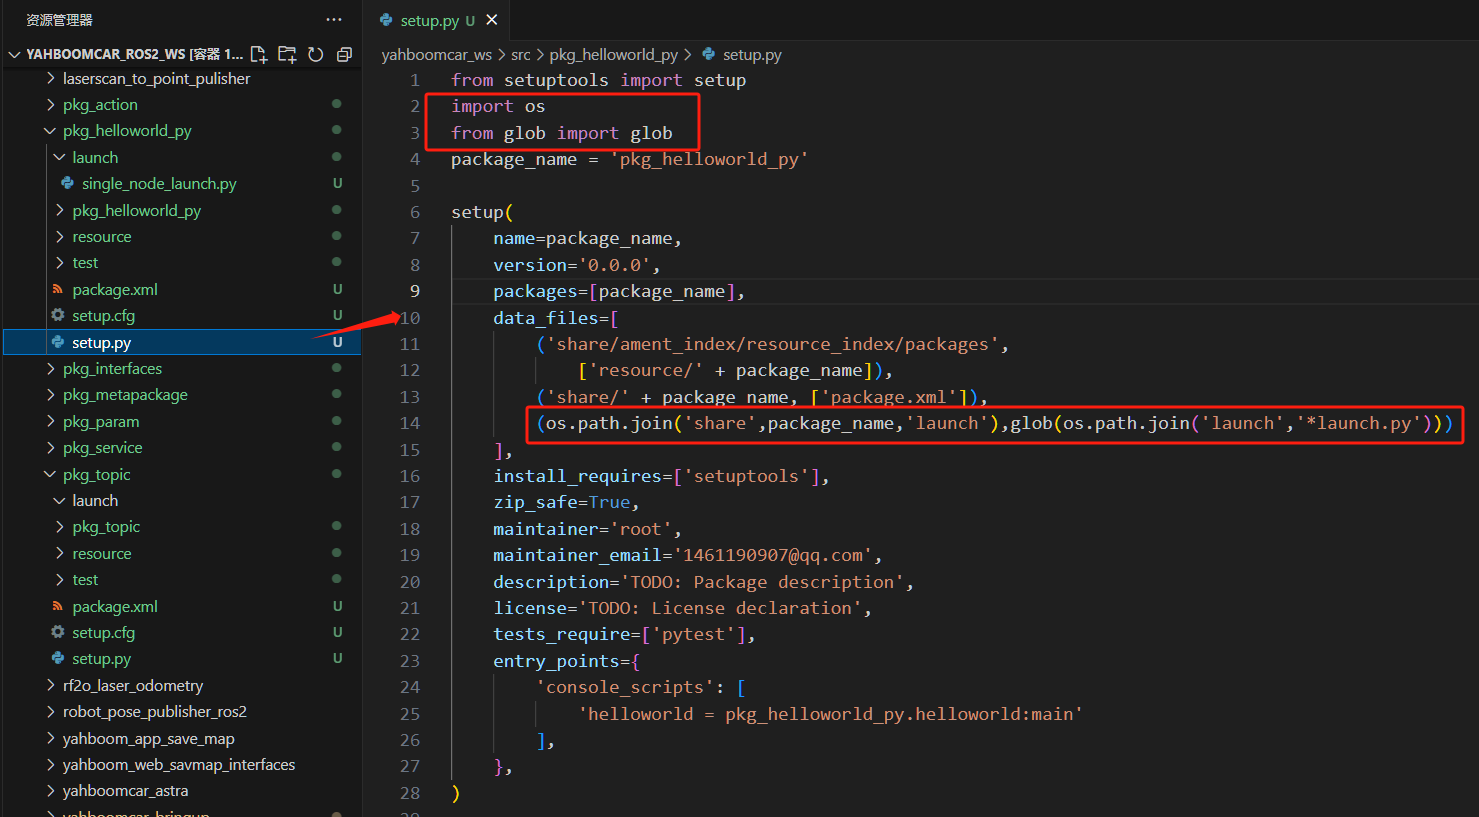
launch文件命名常以LaunchName_launch.py,其中,LaunchName自定义,_launch.py是常认为固定的。需要修改功能包下的setup.py文件,修改内容为添加launch路径下的文件,编译才能生成执行的.py文件,
xxxxxxxxxx #1、导入相关的头文件 import os from glob import glob #2、在data_files的列表中,加上launch路径以及路径下的launch.py文件 ( os . path . join ( 'share' , package_name , 'launch' ), glob ( os . path . join ( 'launch' , '*launch.py' )))
2.3、编译功能包
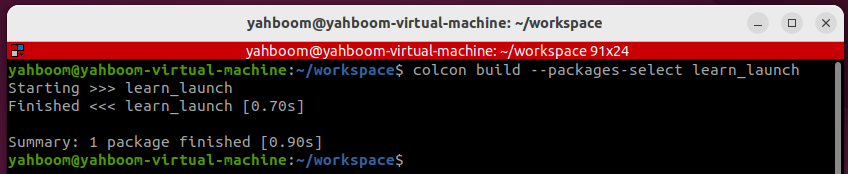
xxxxxxxxxx colcon build \-- packages \- select learn_launch
2.4、运行程序
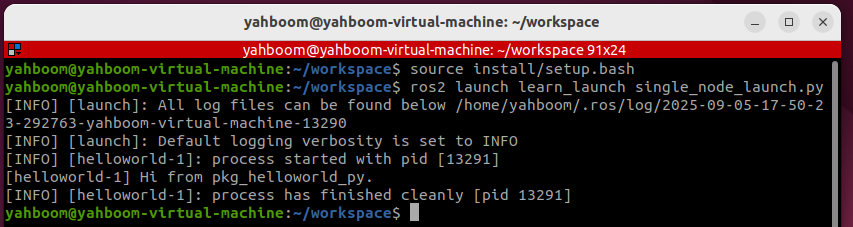
- 刷新环境变量,然后运行launch文件
xxxxxxxxxx ros2 launch learn_launch single_node_launch.py
2.5、源码分析
1、导入相关库
xxxxxxxxxx from launch import LaunchDescription from launch_ros.actions import Node
2、定义一个函数generate_launch_description,并且返回一个launch_description
xxxxxxxxxx def generate_launch_description (): node = Node ( package = 'pkg_helloworld_py' , executable = 'helloworld' , ) return LaunchDescription ([ node ])
定义了一个变量node作为一个节点启动的返回值,调用Node函数,启动重要的两个参数,package和executable。
- package:表示功能包,代表功能包的名字。
- executable:表示执行的程序,可执行程序的名字。
最后调用LaunchDescription函数传入node参数执行返回。
xxxxxxxxxx return LaunchDescription([node])
3、编写多个Node节点的launch
3.1、新建launch文件
新建【multi_node_launch.py】文件,添加如下内容:
xxxxxxxxxx from launch import LaunchDescription from launch_ros . actions import Node def generate_launch_description (): publisher_node = Node ( package = 'pkg_topic' , executable = 'publisher_demo' , output = 'screen' ) subscriber_node = Node ( package = 'pkg_topic' , executable = 'subscriber_demo' , output = 'screen' ) return LaunchDescription ([ publisher_node , subscriber_node ])
3.2、编译功能包
xxxxxxxxxx colcon build \-- packages \- select learn_launch
3.3、运行程序
- 刷新环境变量,然后运行launch文件
xxxxxxxxxx ros2 launch learn_launch multi_node_launch.py
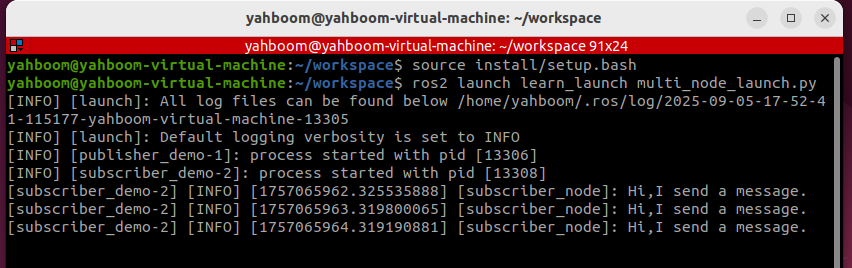
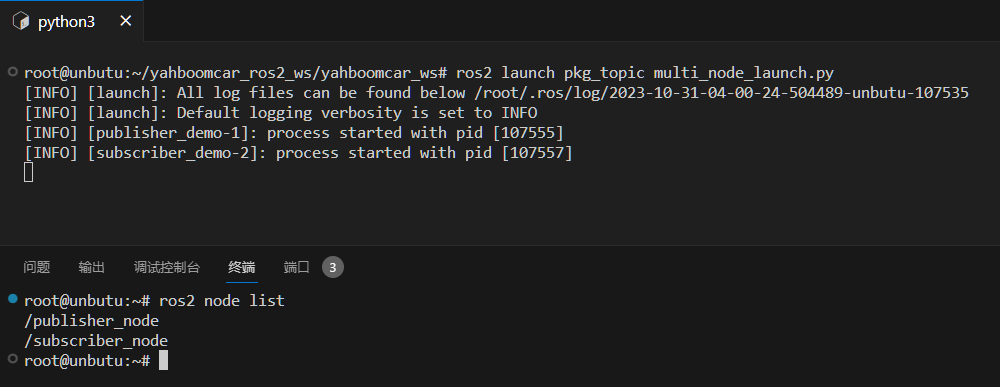
如果终端没有打印内容,我们可以查看哪些节点启动 来验证是否有启动成功,终端输入:
xxxxxxxxxx ros2 node list
3.4、源码解析
大致与simple_node_launch.py差不多,不过是多了一个节点。
4、话题重映射案例
4.1、新建launch文件
在multi_node_launch.py同级目录下新建【remap_name_launch.py】文件,添加如下内容:
xxxxxxxxxx from launch import LaunchDescription from launch_ros . actions import Node def generate_launch_description (): publisher_node = Node ( package = 'pkg_topic' , executable = 'publisher_demo' , output = 'screen' , remappings =[( "/topic_demo" , "/topic_update" )] ) return LaunchDescription ([ publisher_node ])
4.2、编译功能包
xxxxxxxxxx colcon build \-- packages \- select learn_launch
4.3、运行程序
我们先看看没有重映射话题前,publisher_demo节点发布的话题是什么:
xxxxxxxxxx ros2 launch learn_launch multi_node_launch.py ros2 topic list
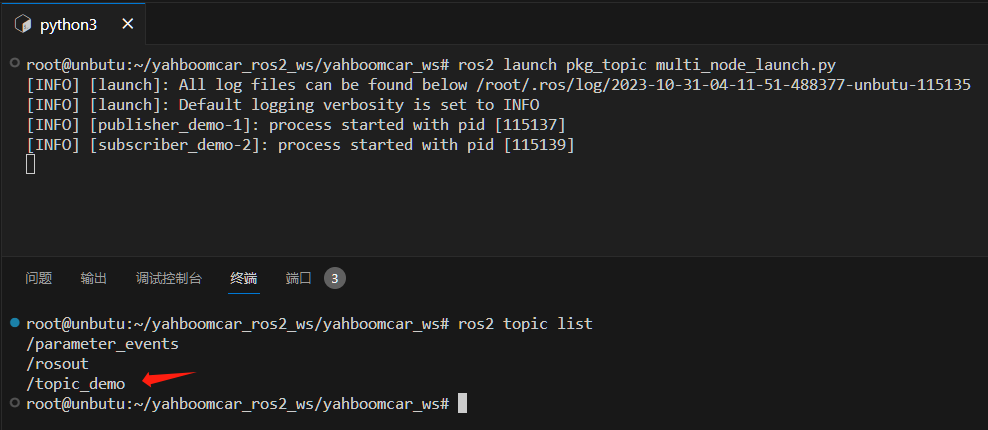
这里的话题是【/topic_demo】
- 再刷新环境变量,运行重映射话题后的程序,看看变化:
xxxxxxxxxx ros2 launch learn_launch remap_name_launch.py ros2 topic list
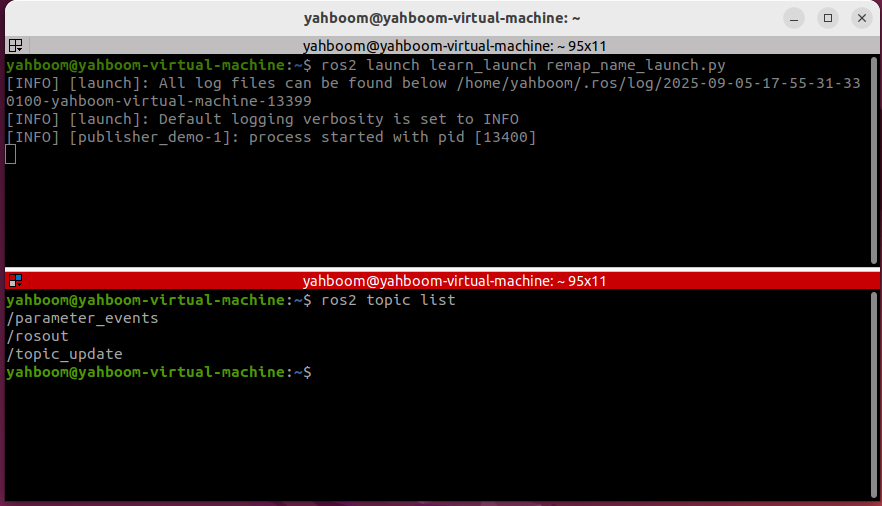
由上图可知,重映射了话题名称为【/topic_update】
4.4、源码分析
主要是加了以下部分:
xxxxxxxxxx remappings=[("/topic_demo", "/topic_update")]
这里就是把原来的/topic_demo话题重映射成/topic_update
5、launch文件嵌套启动另一个launch文件案例
5.1、新建launch文件
在multi_node_launch.py同级目录下新建【include_launch.py】文件,添加如下内容:
xxxxxxxxxx from launch import LaunchDescription from launch_ros . actions import Node import os from launch . actions import IncludeLaunchDescription from launch . launch_description_sources import PythonLaunchDescriptionSource from ament_index_python . packages import get_package_share_directory def generate_launch_description (): hello_launch = IncludeLaunchDescription ( PythonLaunchDescriptionSource ( [ os . path . join ( get_package_share_directory ( 'learn_launch' ), 'launch' ), '/multi_node_launch.py' ]), ) return LaunchDescription ([ hello_launch ])
5.2、编译功能包
xxxxxxxxxx colcon build \-- packages \- select learn_launch
5.3、运行程序
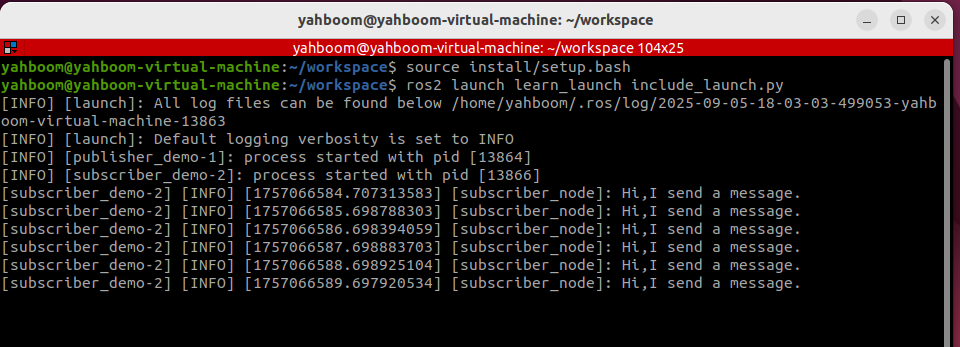
- 刷新环境变量运行launch文件
xxxxxxxxxx ros2 launch learn_launch include_launch.py
5.4、源码分析
- 嵌套启动launch文件需要使用launch系统的 IncludeLaunchDescription和PythonLaunchDescriptionSource两个类
- os.path.join(get_package_share_directory('learn_launch'):获取功能包的位置,其中的'learn_launch'为功能包的名字;
- launch'):表示存放功能包下存放launch文件的文件夹;
- /multi_node_launch.py':表示该功能包launch文件夹下的/multi_node_launch.py文件。
6、综合launch文件示例
本案例主要展示如何编写复杂的launch文件,程序的功能可忽略。
6.1、新建launch文件
在multi_node_launch.py同级目录下新建【complex_launch.py】文件,添加如下内容:
xxxxxxxxxx import os from ament_index_python import get_package_share_directory from launch import LaunchDescription from launch . actions import DeclareLaunchArgument from launch . actions import IncludeLaunchDescription from launch . actions import GroupAction from launch . launch_description_sources import PythonLaunchDescriptionSource from launch . substitutions import LaunchConfiguration from launch . substitutions import TextSubstitution from launch_ros . actions import Node from launch_ros . actions import PushRosNamespace def generate_launch_description (): # args that can be set from the command line or a default will be used background_r_launch_arg = DeclareLaunchArgument ( "background_r" , default_value = TextSubstitution ( text = "0" ) ) background_g_launch_arg = DeclareLaunchArgument ( "background_g" , default_value = TextSubstitution ( text = "255" ) ) background_b_launch_arg = DeclareLaunchArgument ( "background_b" , default_value = TextSubstitution ( text = "0" ) ) chatter_ns_launch_arg = DeclareLaunchArgument ( "chatter_ns" , default_value = TextSubstitution ( text = "my/chatter/ns" ) ) # include another launch file launch_include = IncludeLaunchDescription ( PythonLaunchDescriptionSource ( os . path . join ( get_package_share_directory ( 'demo_nodes_cpp' ), 'launch/topics/talker_listener.launch.py' )) ) # include another launch file in the chatter_ns namespace launch_include_with_namespace = GroupAction ( actions =[ # push-ros-namespace to set namespace of included nodes PushRosNamespace ( LaunchConfiguration ( 'chatter_ns' )), IncludeLaunchDescription ( PythonLaunchDescriptionSource ( os . path . join ( get_package_share_directory ( 'demo_nodes_cpp' ), 'launch/topics/talker_listener.launch.py' )) ), ] ) # start a turtlesim_node in the turtlesim1 namespace turtlesim_node = Node ( package = 'turtlesim' , namespace = 'turtlesim1' , executable = 'turtlesim_node' , name = 'sim' ) # start another turtlesim_node in the turtlesim2 namespace # and use args to set parameters turtlesim_node_with_parameters = Node ( package = 'turtlesim' , namespace = 'turtlesim2' , executable = 'turtlesim_node' , name = 'sim' , parameters =[{ "background_r" : LaunchConfiguration ( 'background_r' ), "background_g" : LaunchConfiguration ( 'background_g' ), "background_b" : LaunchConfiguration ( 'background_b' ), }] ) # perform remap so both turtles listen to the same command topic forward_turtlesim_commands_to_second_turtlesim_node = Node ( package = 'turtlesim' , executable = 'mimic' , name = 'mimic' , remappings =[ ( '/input/pose' , '/turtlesim1/turtle1/pose' ), ( '/output/cmd_vel' , '/turtlesim2/turtle1/cmd_vel' ), ] ) return LaunchDescription ([ background_r_launch_arg , background_g_launch_arg , background_b_launch_arg , chatter_ns_launch_arg , launch_include , launch_include_with_namespace , turtlesim_node , turtlesim_node_with_parameters , forward_turtlesim_commands_to_second_turtlesim_node , ])
6.2、编译工作空间
xxxxxxxxxx colcon build \-- packages \- select learn_launch
6.3、运行程序
- 终端刷新环境变量,运行launch文件
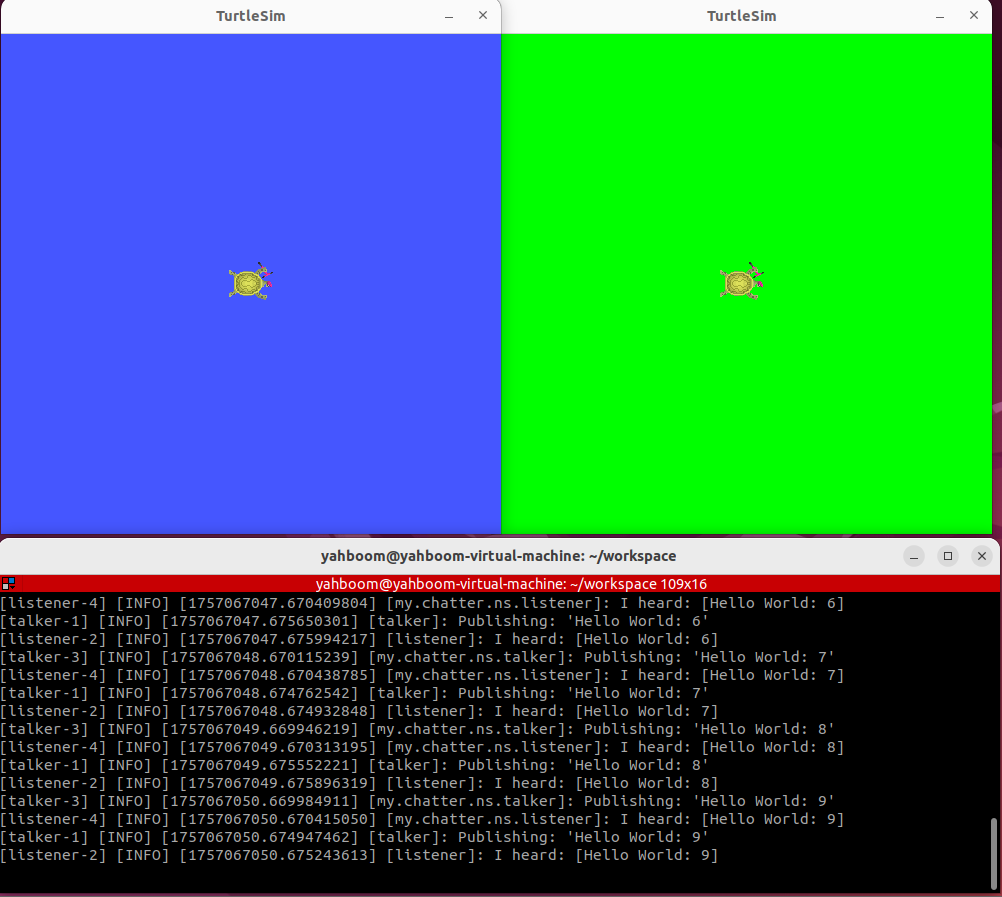
xxxxxxxxxx ros2 launch learn_launch complex_launch.py
在宿主机的vnc上会显示两子小乌龟。
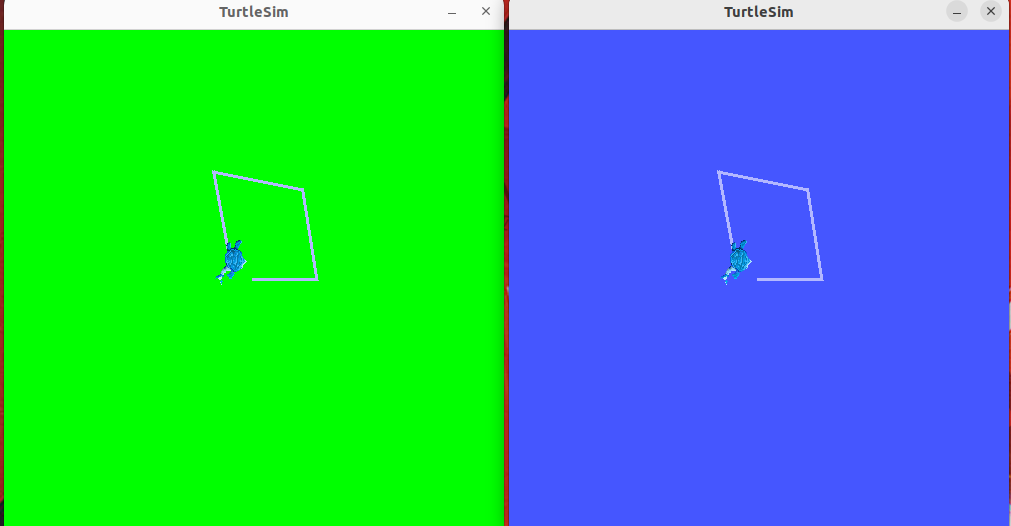
- 启动键盘控制节点,并添加命名空间(因为我们在launch文件中启动节点时添加了命名空间)
xxxxxxxxxx ros2 run turtlesim turtle_teleop_key --ros-args -r __ns:=/turtlesim1
- 使用上下左右键控制海龟1运动,海龟2会完全模仿海龟1的行为
6.4、程序说明
程序主要是启动:
1、demo_nodes_cpp的talker_listener节点,
2、带命名空间的talker_listener节点
3、已turtlesim1为命名空间的小乌龟1
4、已turtlesim2为命名空间的小乌龟2
5、执行重映射,使两只乌龟都能听到相同的命令主题
7、xml实现
7.1、新建launch文件
在complex_launch.py同级目录下新建【complex_launch.xml】文件,添加如下内容:
xxxxxxxxxx < launch > <!-- args that can be set from the command line or a default will be used --> < arg name = "background_r" default = "0" /> < arg name = "background_g" default = "255" /> < arg name = "background_b" default = "0" /> < arg name = "chatter_ns" default = "my/chatter/ns" /> <!-- include another launch file --> < include file = "$(find-pkg-share demo_nodes_cpp)/launch/topics/talker_listener.launch.py" /> <!-- include another launch file in the chatter_ns namespace--> < group > <!-- push-ros-namespace to set namespace of included nodes --> < push-ros-namespace namespace = "$(var chatter_ns)" /> < include file = "$(find-pkg-share demo_nodes_cpp)/launch/topics/talker_listener.launch.py" /> </ group > <!-- start a turtlesim_node in the turtlesim1 namespace --> < node pkg = "turtlesim" exec = "turtlesim_node" name = "sim" namespace = "turtlesim1" /> <!-- start another turtlesim_node in the turtlesim2 namespace and use args to set parameters --> < node pkg = "turtlesim" exec = "turtlesim_node" name = "sim" namespace = "turtlesim2" > < param name = "background_r" value = "$(var background_r)" /> < param name = "background_g" value = "$(var background_g)" /> < param name = "background_b" value = "$(var background_b)" /> </ node > <!-- perform remap so both turtles listen to the same command topic --> < node pkg = "turtlesim" exec = "mimic" name = "mimic" > < remap from = "/input/pose" to = "/turtlesim1/turtle1/pose" /> < remap from = "/output/cmd_vel" to = "/turtlesim2/turtle1/cmd_vel" /> </ node > </ launch >
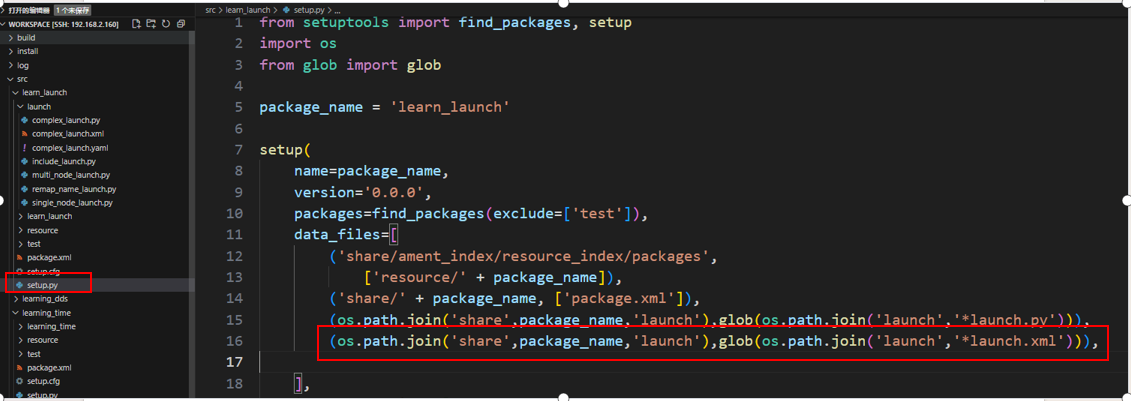
7.2、setup.py文件配置
- 需要配置编译文件,在编译时将我们.xml格式的launch文件拷贝到install安装目录下,ros系统才能找到我们的文件
7.3、编译功能包
xxxxxxxxxx colcon build \-- packages \- select learn_launch
7.4、运行程序
终端输入:
xxxxxxxxxx ros2 launch learn_launch complex_launch.xml
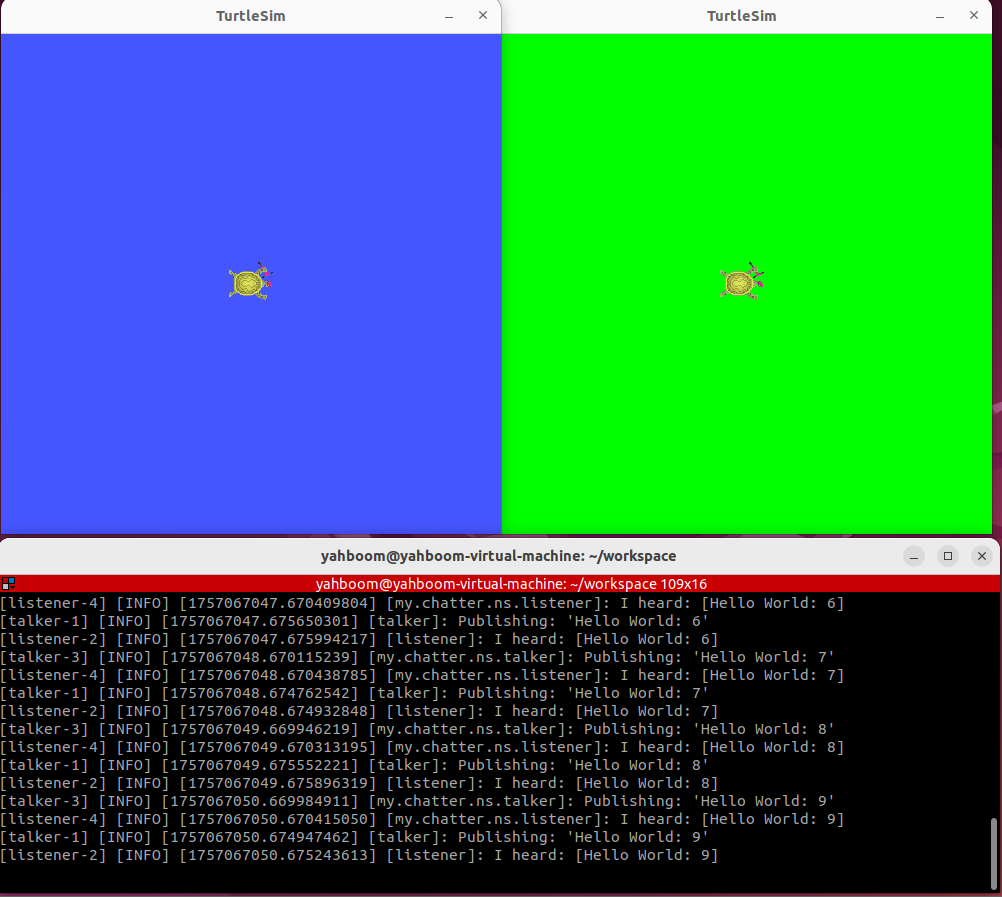
- 按照预期会出现两只小海龟,并且终端会打印日志信息
- 启动键盘控制节点,并添加命名空间
xxxxxxxxxx ros2 run turtlesim turtle_teleop_key \--ros-args -r __ns: = /turtlesim1
使用键盘控制启动海龟1进行运行,海龟2会完全模仿海龟1的行为
8、yaml实现
8.1、新建launch文件
在complex_launch.py同级目录下新建【complex_launch.yaml】文件,添加如下内容:
xxxxxxxxxx launch : # args that can be set from the command line or a default will be used \- arg : name : "background_r" default : "0" \- arg : name : "background_g" default : "255" \- arg : name : "background_b" default : "0" \- arg : name : "chatter_ns" default : "my/chatter/ns" # include another launch file \- include : file : "$(find-pkg-share demo_nodes_cpp)/launch/topics/talker_listener.launch.py" # include another launch file in the chatter_ns namespace \- group : \- push-ros-namespace : namespace : "$(var chatter_ns)" \- include : file : "$(find-pkg-share demo_nodes_cpp)/launch/topics/talker_listener.launch.py" # start a turtlesim_node in the turtlesim1 namespace \- node : pkg : "turtlesim" exec : "turtlesim_node" name : "sim" namespace : "turtlesim1" # start another turtlesim_node in the turtlesim2 namespace and use args to set parameters \- node : pkg : "turtlesim" exec : "turtlesim_node" name : "sim" namespace : "turtlesim2" param : \- name : "background_r" value : "$(var background_r)" \- name : "background_g" value : "$(var background_g)" \- name : "background_b" value : "$(var background_b)" # perform remap so both turtles listen to the same command topic \- node : pkg : "turtlesim" exec : "mimic" name : "mimic" remap : \- from : "/input/pose" to : "/turtlesim1/turtle1/pose" \- from : "/output/cmd_vel" to : "/turtlesim2/turtle1/cmd_vel"
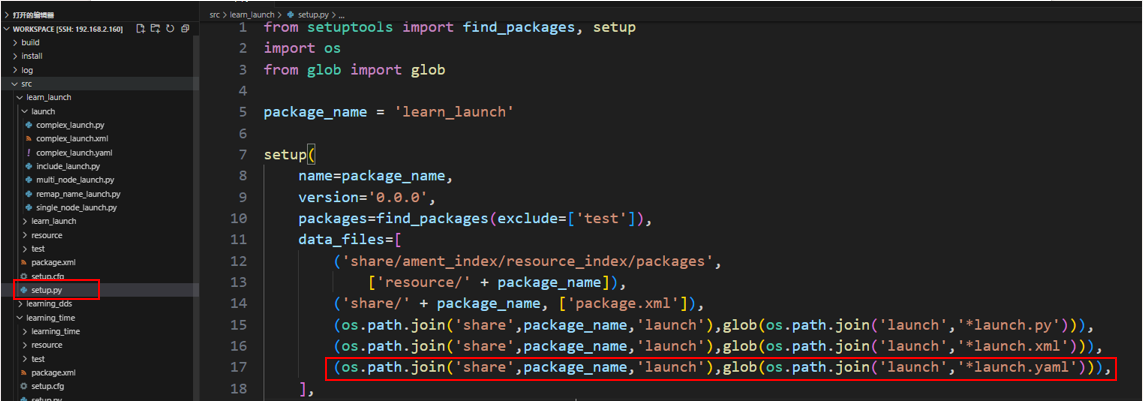
8.2、配置
- 需要配置编译文件,在编译时将我们.yaml格式的launch文件拷贝到install安装目录下,ros系统才能找到我们的文件
8.3、编译功能包
xxxxxxxxxx colcon build \-- packages \- select learn_launch
8.4、运行程序
- 刷新环境变量然后运行
xxxxxxxxxx ros2 launch learn_launch complex_launch.yaml
- 按照预期会出现两只小海龟,并且终端会打印日志信息
- 启动键盘控制节点,并添加命名空间
xxxxxxxxxx ros2 run turtlesim turtle_teleop_key \--ros-args -r __ns: = /turtlesim1
使用键盘控制启动海龟1进行运行,海龟2会完全模仿海龟1的行为