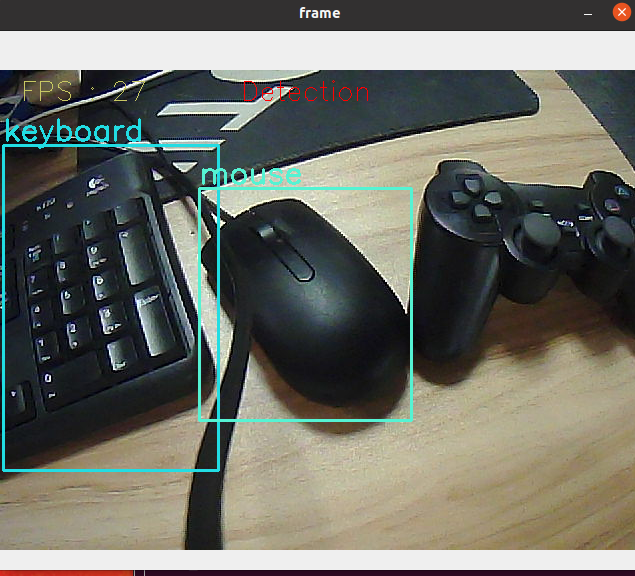
目标检测
目标检测1、模型结构2、代码解析3、启动3.1、进入Docker3.2、启动程序
本节主要解决的问题是如何使用OpenCV中的dnn模块,用来导入一个实现训练好的目标检测网络。但是对opencv的版本是有要求的。
目前用深度学习进行目标检测,主要有三种方法:
-
Faster R-CNNs
-
You Only Look Once(YOLO)
-
Single Shot Detectors(SSDs)
Faster R-CNNs是最常听说的基于深度学习的神经网络了。然而,这种方法在技术上是很难懂的(尤其是对于深度学习新手),也难以实现,训练起来也是很困难。
此外,即使是使用了“Faster”的方法实现R-CNNs(这里R表示候选区域Region Proposal),算法依然是比较慢的,大约是7FPS。
如果我们追求速度,我们可以转向YOLO,因为它非常的快,在TianXGPU上可以达到40-90 FPS,最快的版本可能达到155 FPS。但YOLO的问题在于它的精度还有待提高。
SSDs最初是由谷歌开发的,可以说是以上两者之间的平衡。相对于Faster R-CNNs,它的算法更加直接。相对于YOLO,又更加准确。
1、模型结构
MobileNet的主要工作是用depthwise sparable convolutions(深度级可分离卷积)替代过去的standard convolutions(标准卷积)来解决卷积网络的计算效率和参数量的问题。MobileNets模型基于是depthwise sparable convolutions(深度级可分离卷积),它可以将标准卷积分解成一个深度卷积和一个点卷积(1 × 1卷积核)。深度卷积将每个卷积核应用到每一个通道,而1 × 1卷积用来组合通道卷积的输出。
在MobileNet的基本组件中会加入Batch Normalization(BN),即在每次SGD(随机梯度下降)时,标准化处理,使得结果(输出信号各个维度)的均值为0,方差为1。一般在神经网络训练时遇到收敛速度很慢,或梯度爆炸等无法训练的状况时可以尝试BN来解决。另外,在一般使用情况下也可以加入BN来加快训练速度,提高模型精度。
除此之外,模型还使用ReLU激活函数,所以depthwise separable convolution的基本结构如下图所示:

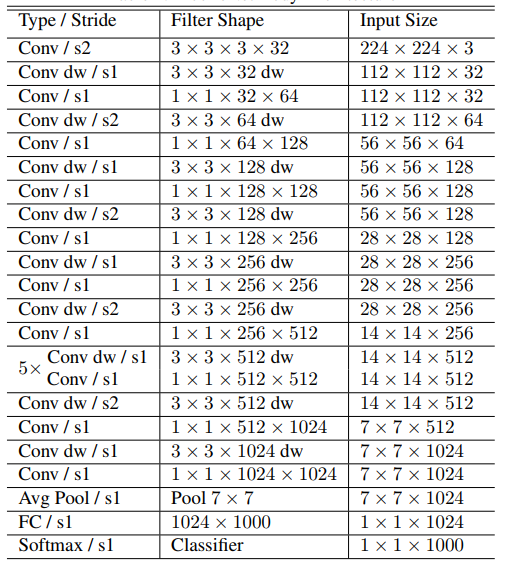
而MobileNets网络是由很多上图所示的depthwise separable convolution组合而成的。其具体的网络结构如下图所示:
2、代码解析
可识别的物体列表
[ person , bicycle , car , motorcycle , airplane , bus , train , truck , boat , traffic light , fire hydrant , street sign , stop sign , parking meter , bench , bird , cat , dog , horse , sheep , cow , elephant , bear , zebra , giraffe , hat , backpack , umbrella , shoe , eye glasses , handbag , tie , suitcase , frisbee , skis , snowboard , sports ball , kite , baseball bat , baseball glove , skateboard , surfboard , tennis racket , bottle , plate , wine glass , cup , fork , knife , spoon , bowl , banana , apple , sandwich , orange , broccoli , carrot , hot dog , pizza , donut , cake , chair , couch , potted plant , bed , mirror , dining table , window , desk , toilet , door , tv , laptop , mouse , remote , keyboard , cell phone , microwave , oven , toaster , sink , refrigerator , blender , book , clock , vase , scissors , teddy bear , hair drier , toothbrush ]
加载类别【object_detection_coco.txt】,导入模型【frozen_inference_graph.pb】,指定深度学习框架【TensorFlow】
xxxxxxxxxx # 加载COCO类名称 with open ( 'object_detection_coco.txt' , 'r' ) as f : class_names = f . read (). split ( '\n' ) # 对于不同目标显示不同颜色 COLORS = np . random . uniform ( 0 , 255 , size = ( len ( class_names ), 3 )) # 加载DNN图像模型 model = cv . dnn . readNet ( model = 'frozen_inference_graph.pb' , config = 'ssd_mobilenet_v2_coco.txt' , framework = 'TensorFlow' )
导入图片,提取了高度和宽度,计算了300x300的像素blob,把这个blob传入神经网络
xxxxxxxxxx def Target_Detection ( image ): image_height , image_width , _ = image . shape # 从图像中创建blob blob = cv . dnn . blobFromImage ( image = image , size = ( 300 , 300 ), mean = ( 104 , 117 , 123 ), swapRB = True ) model . setInput ( blob ) output = model . forward () # 遍历每个检测 for detection in output [ 0 , 0 , :, :]: # 提取检测的置信度 confidence = detection [ 2 ] # 仅在检测置信度高于某个阈值时,绘制边界框,否则跳过 if confidence > .4 : # 获取类的ID class_id = detection [ 1 ] # 将类的id 映射到类 class_name = class_names [ int ( class_id ) \- 1 ] color = COLORS [ int ( class_id )] # 获取边界框坐标 box_x = detection [ 3 ] * image_width box_y = detection [ 4 ] * image_height # 获取边界框的宽度和高度 box_width = detection [ 5 ] * image_width box_height = detection [ 6 ] * image_height # 在每个检测到的对象周围绘制一个矩形 cv . rectangle ( image , ( int ( box_x ), int ( box_y )), ( int ( box_width ), int ( box_height )), color , thickness = 2 ) # 将类名文本写在检测到的对象上 cv . putText ( image , class_name , ( int ( box_x ), int ( box_y \- 5 )), cv . FONT_HERSHEY_SIMPLEX , 1 , color , 2 ) return image
3、启动
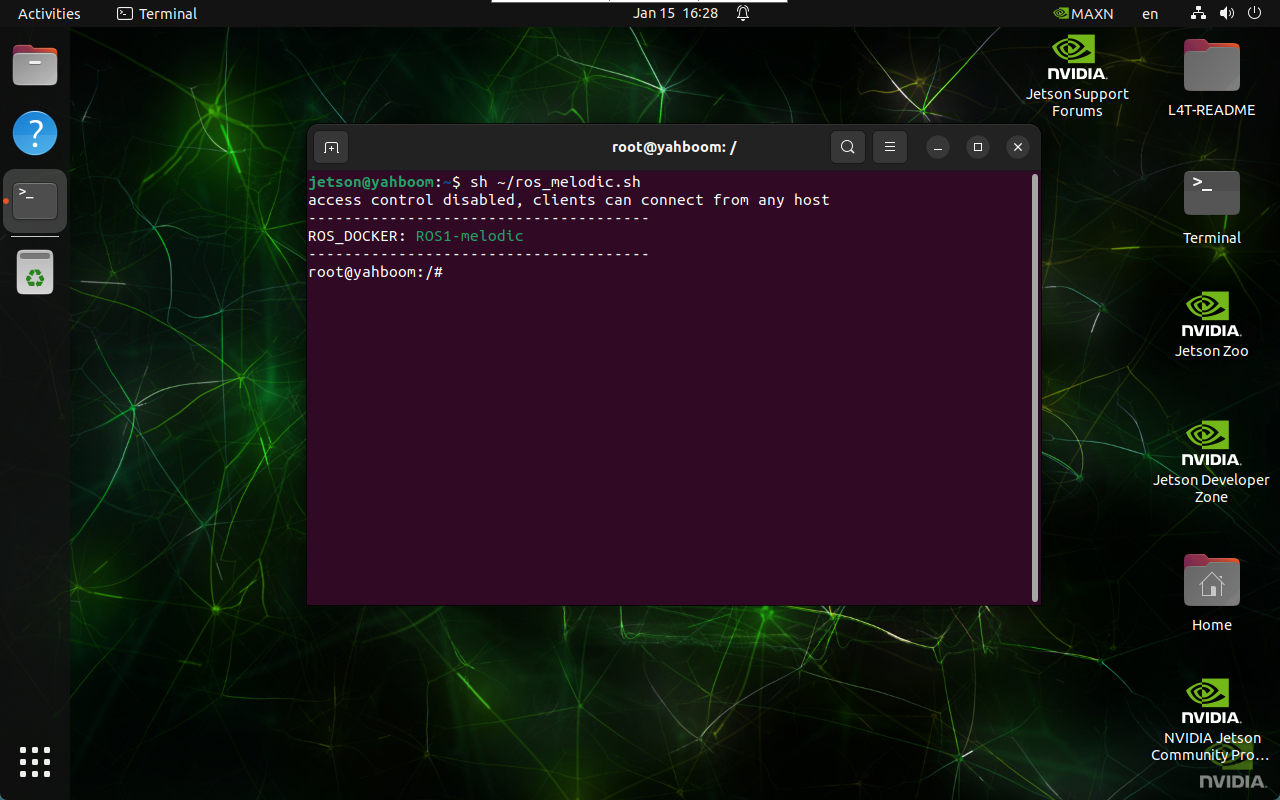
3.1、进入Docker
x sh ~/ros_melodic.sh
3.2、启动程序
xxxxxxxxxx cd ~/yahboomcar_ws/src/yahboomcar_visual/detection python3 target_detection.py
点击图像框后,使用键盘【f】键切换人体姿态估计。
xxxxxxxxxx if action == ord ( 'f' ) or action == ord ( 'F' ): state = not state # 功能切换
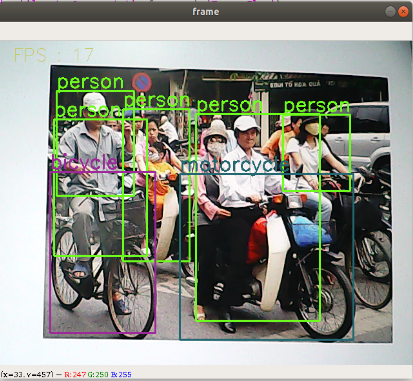
摄像头显示画面: